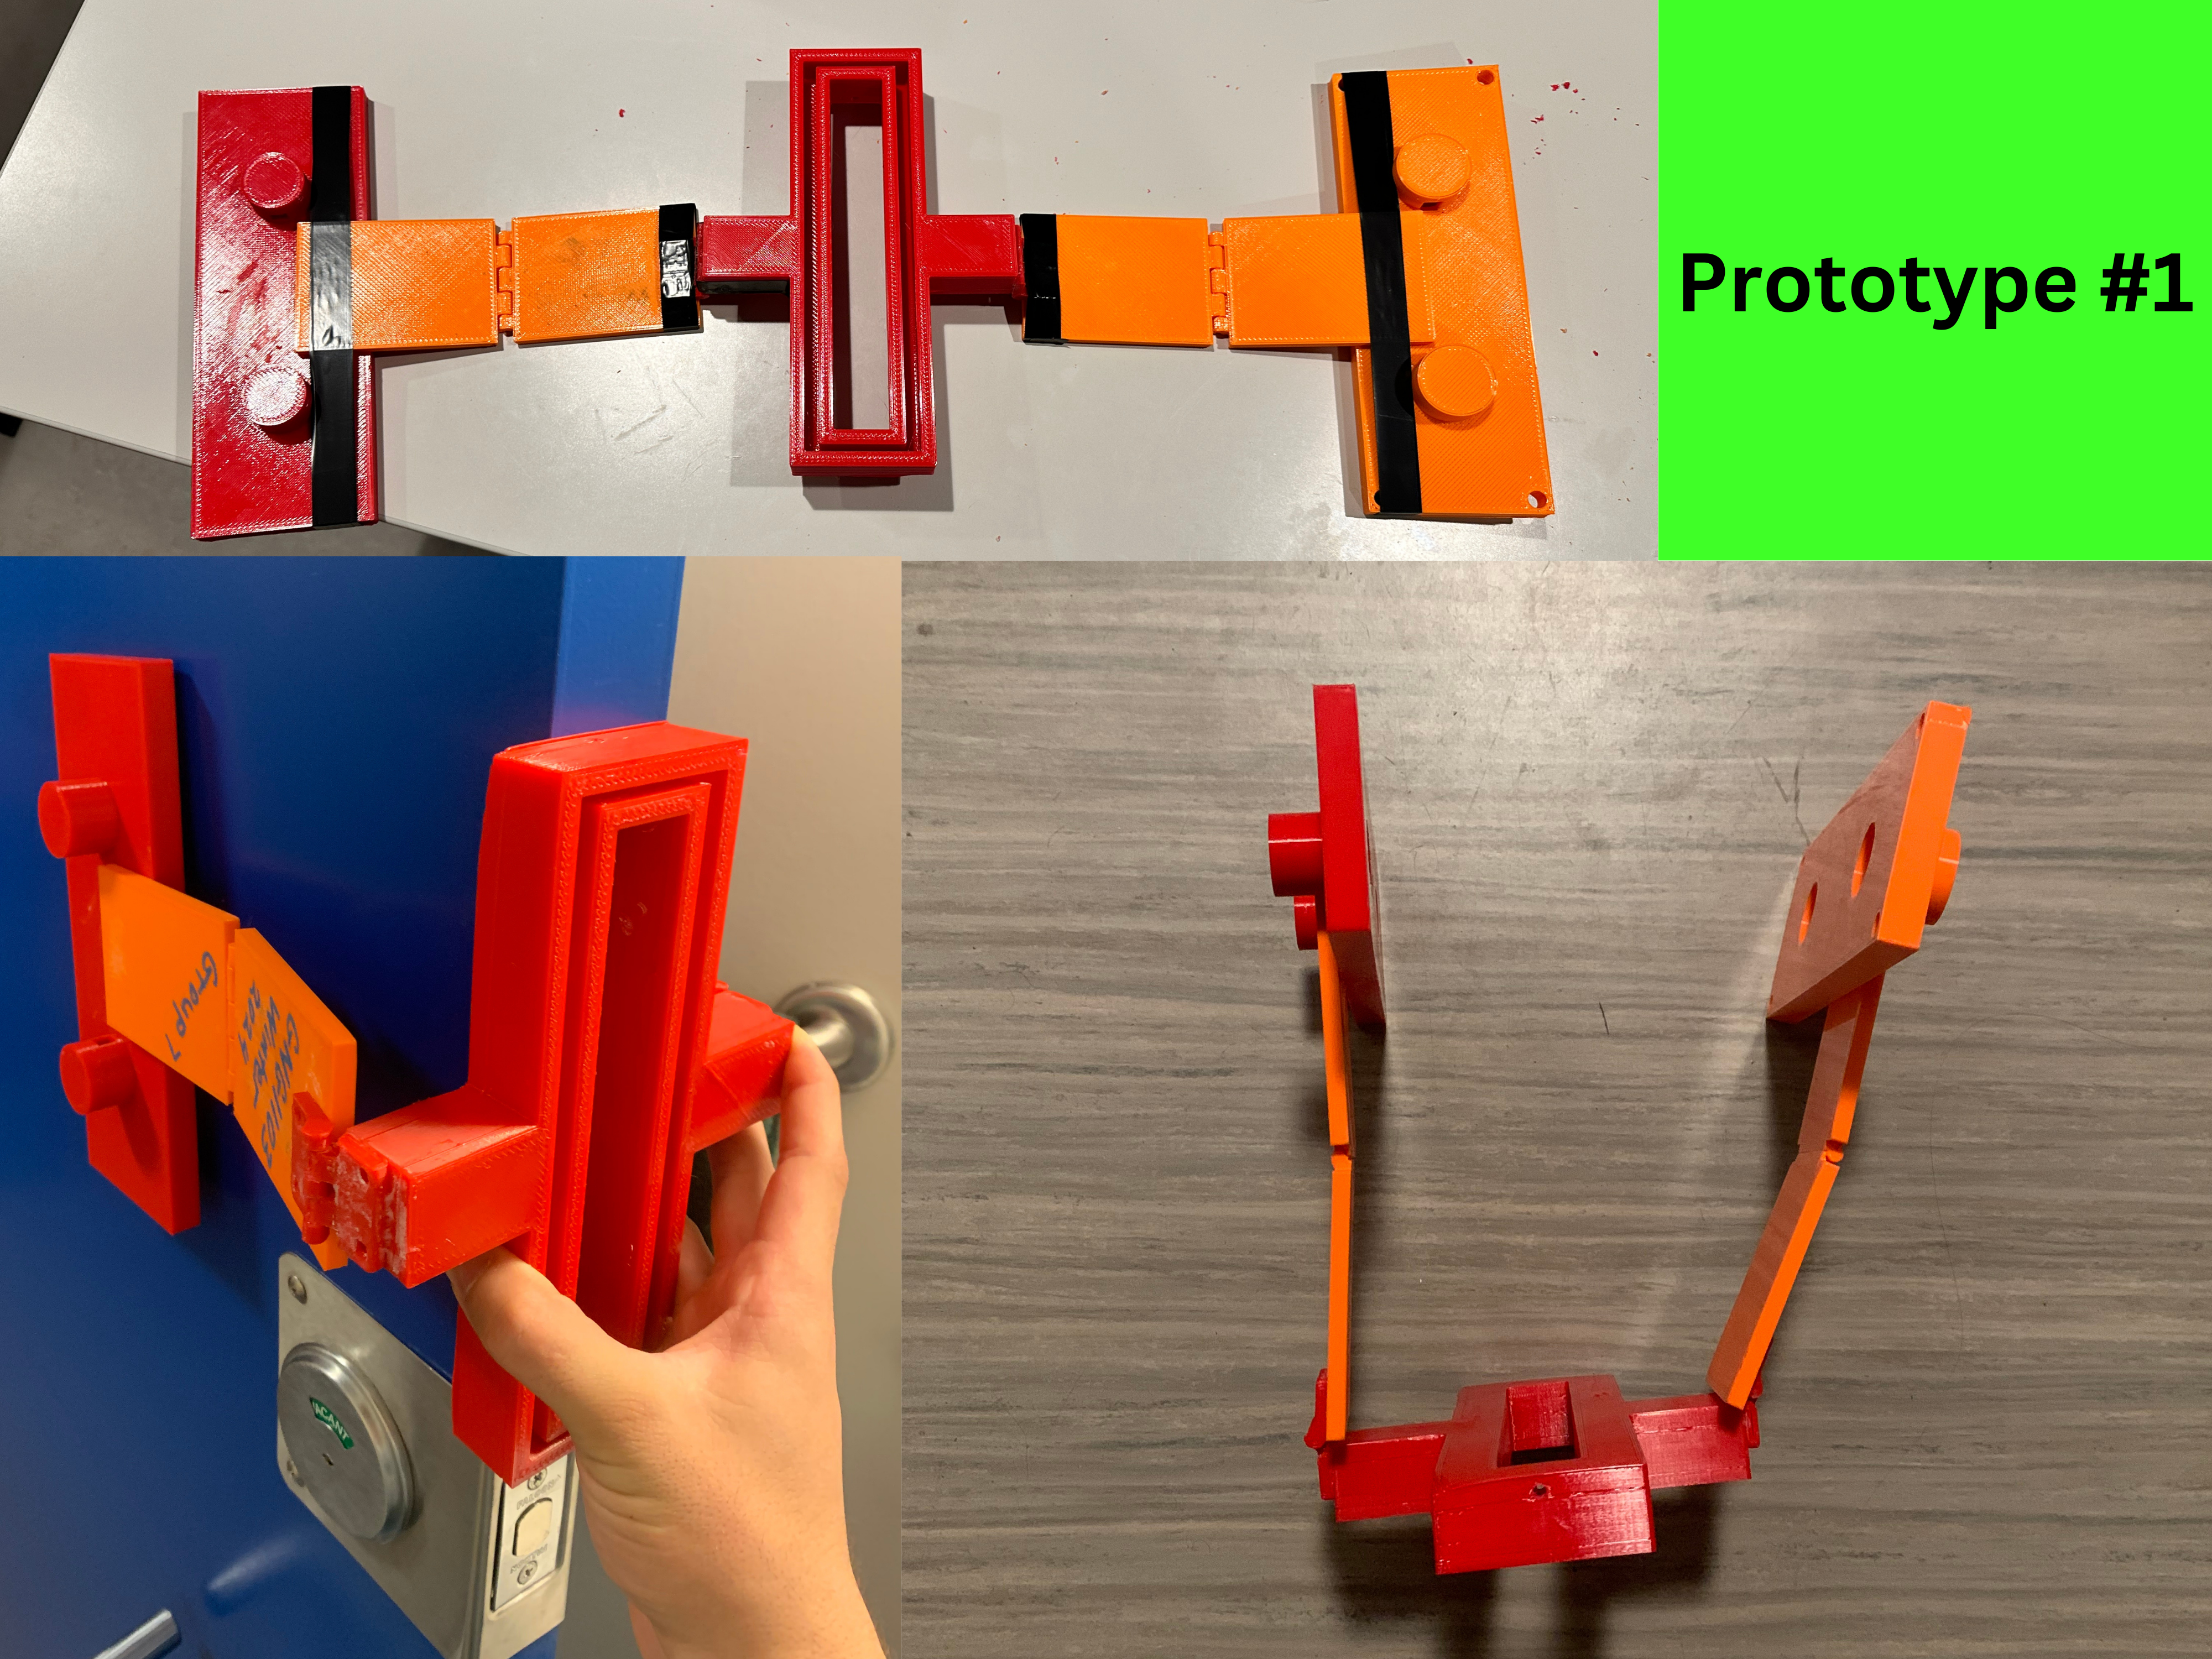
Prototype #1
Test Plan
- Basic structure, hinges and mechanical functionality completed
- All 3D components created on OnShape has been printed and assembled
- Basic structural integrity should be accounted for
Results
- All components were successfully assembled through the use of super glue, hot glue and other adhesives.
- Moving forward, we will be to stay away from weak bonding methods and strive for more permanent solutions that will improve performance.
- Certain components were printed using 70% infill. This led to certain structural issues that will be corrected by the next prototype. Through using 100% infill, we can ensure that the jig will be strong enough to withstand years of use.
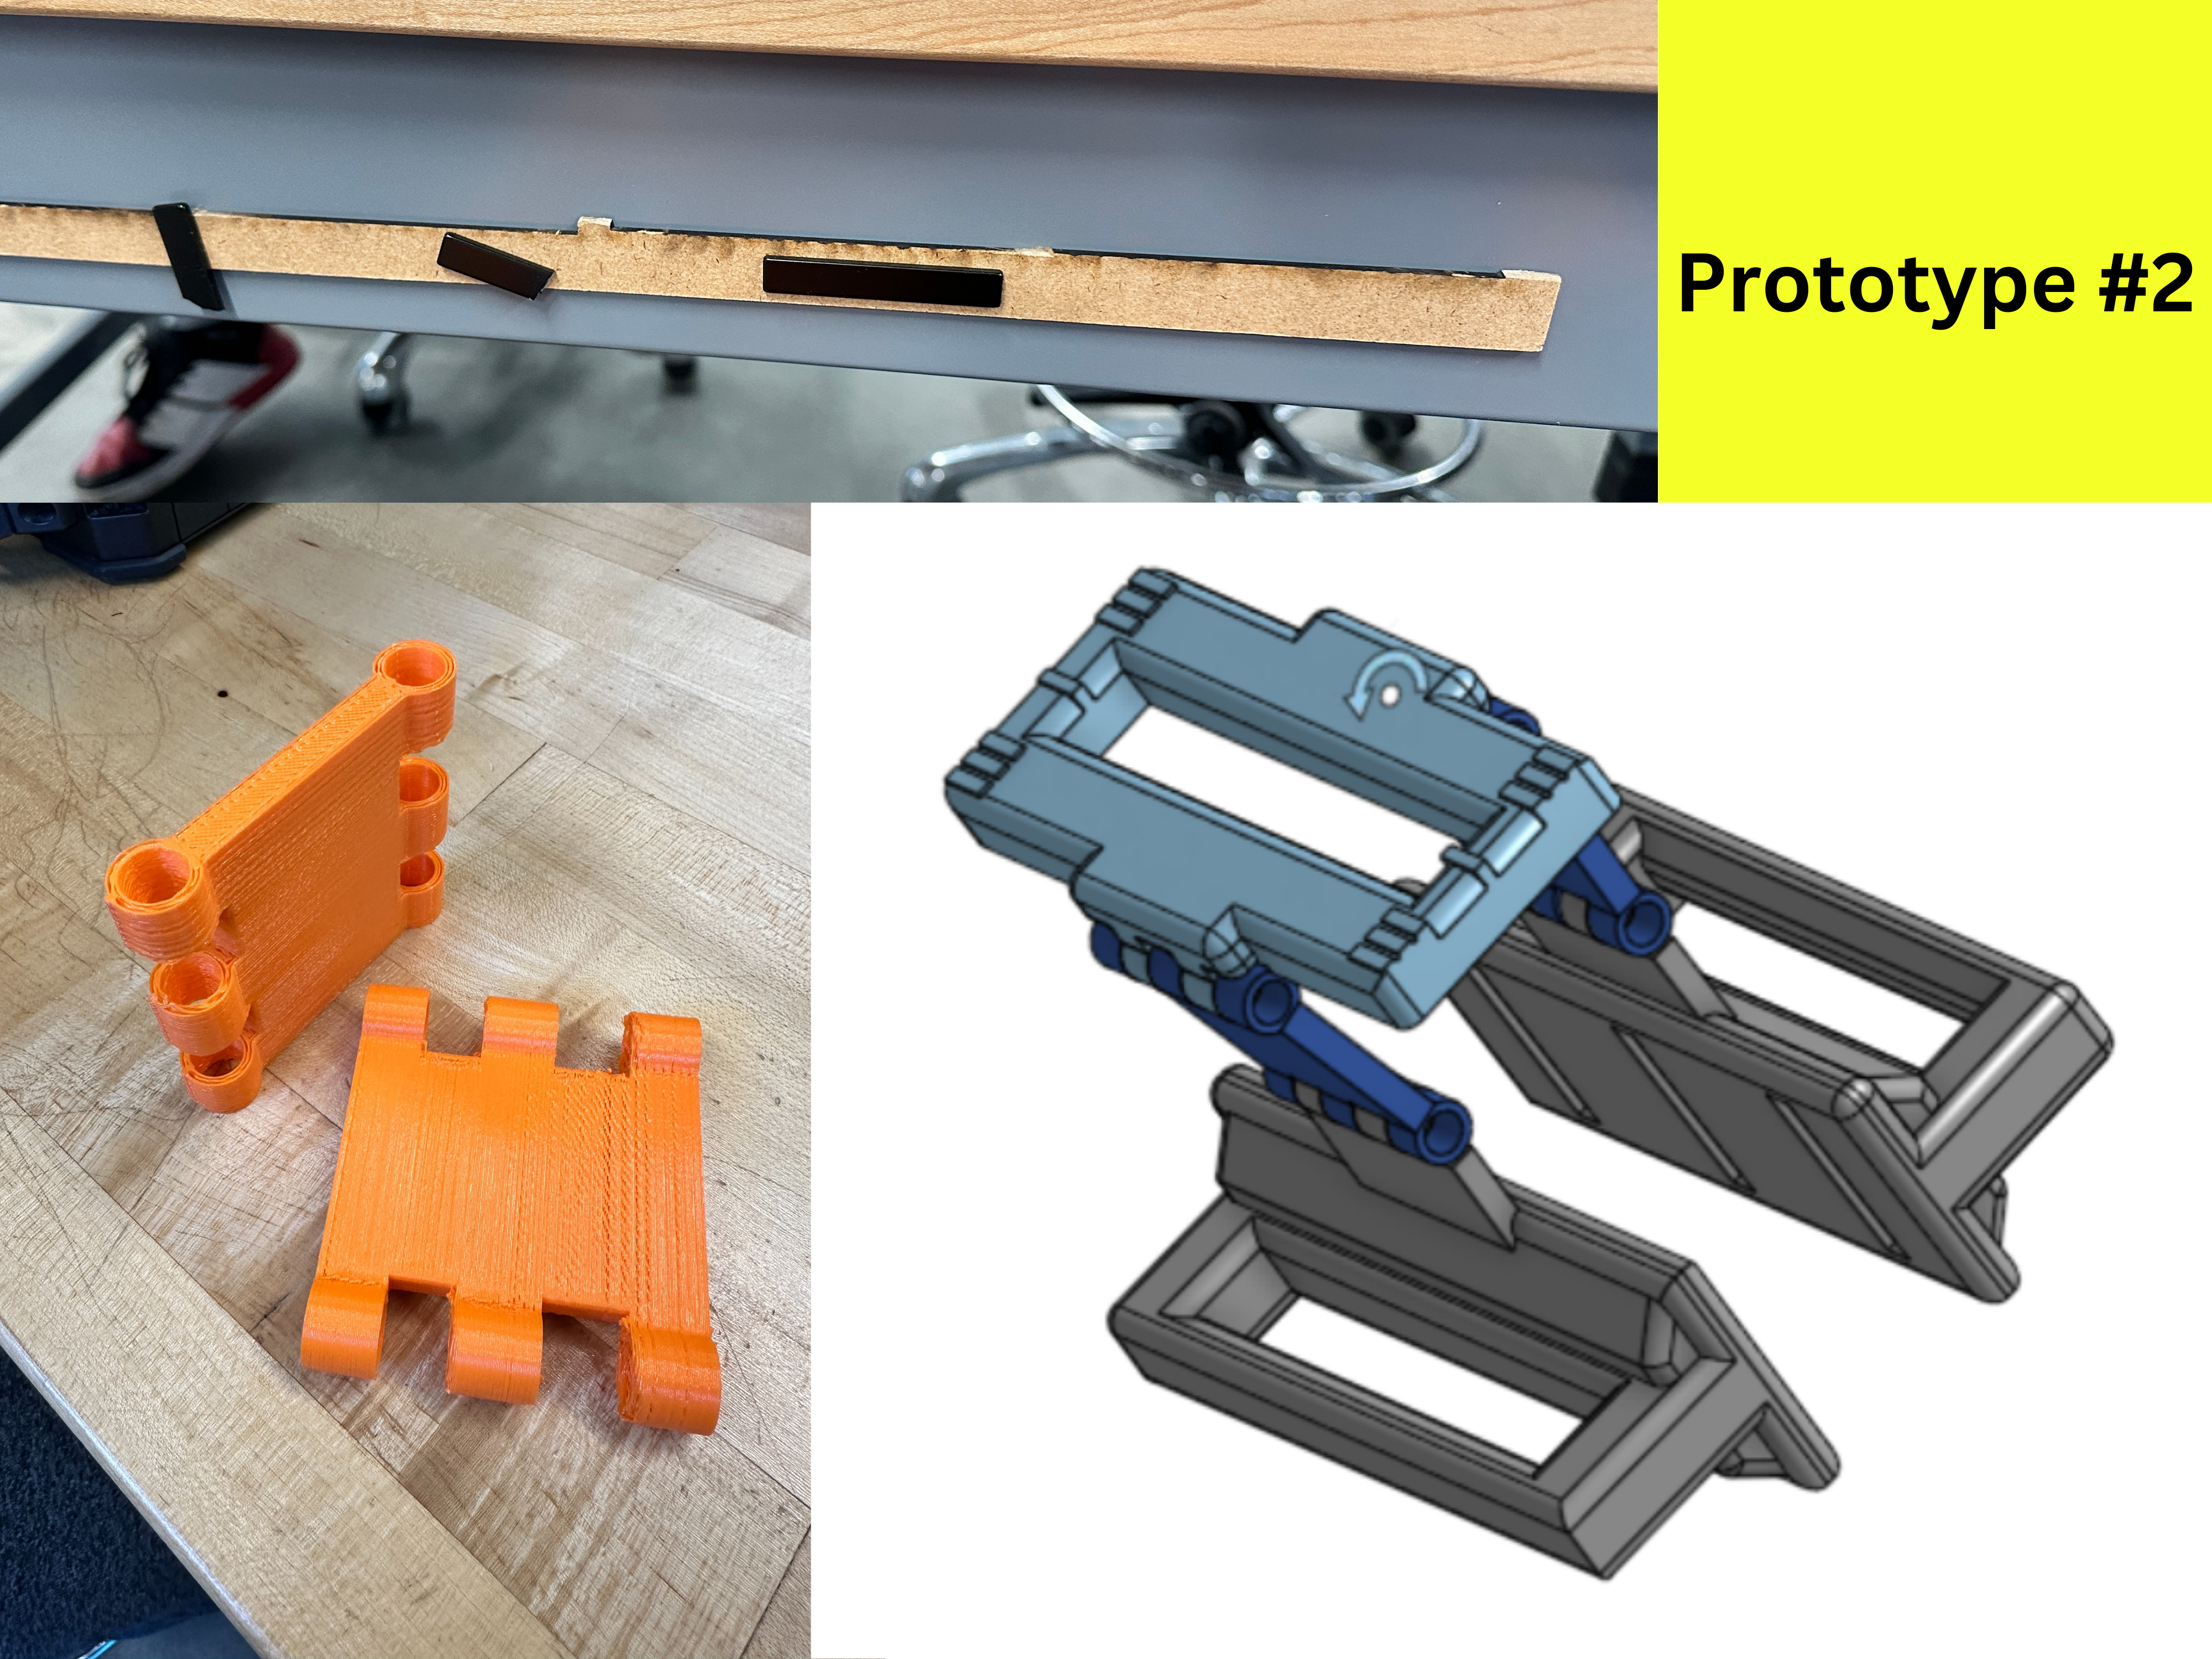
Prototype #2
Test Plan
- Changing the design from utilizing electromagnets to neodymium
- Adding handles so that the user can easily manipulate the clamping section of the jig
- All jig components will be 100% infilled to allow for maximum structural integrity
- Testing if neodymium magnets will penetrate the wood veneer
Results
- Jig is significantly sturdier and can withstand further wear and tear
- Moving forward, we will look into using metal nuts, bolts and washers to put the hinges together. This way, we can ensure the strength of the piece.
- Use of three neodymium magnets will produce a strong enough magnetic force to hold onto the steel door through a 3/32” wood veneer.
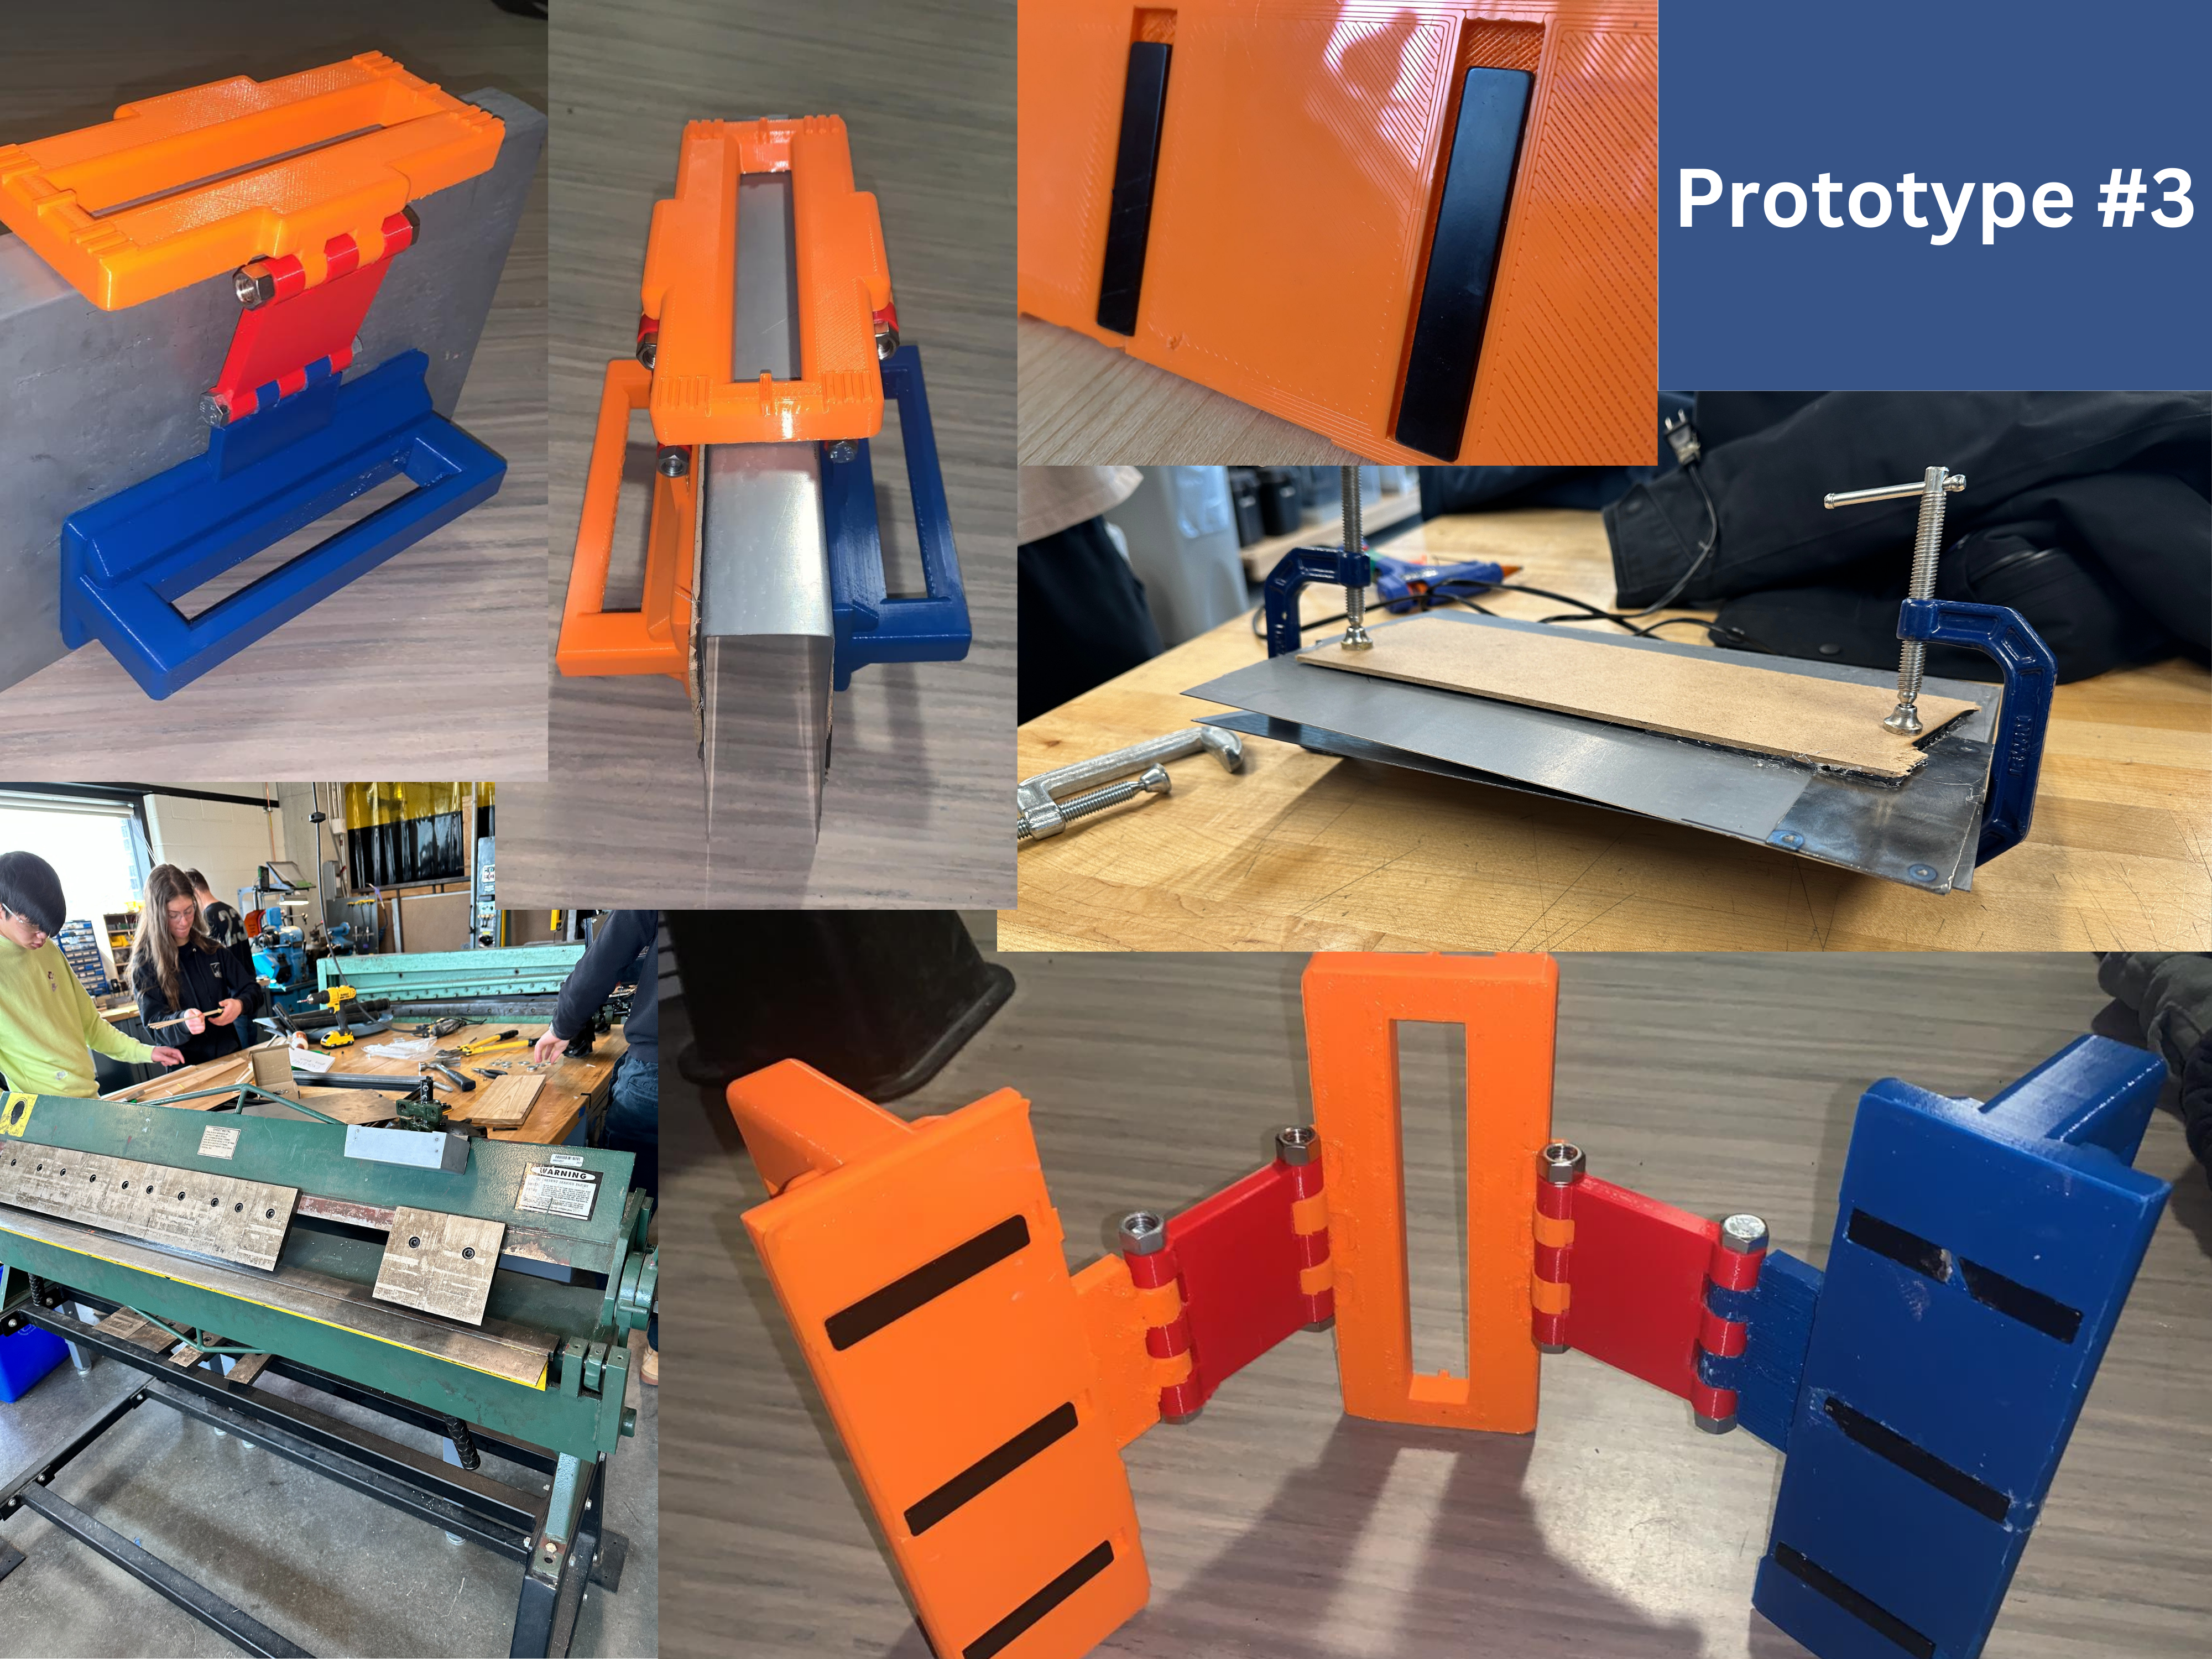
Prototype #3
Test Plan
- Will aim to making the jig the same colour
- Ensure that the longevity of our design is correct
Results
- Jig is currently a mismatch of colours, thus will look into spray painting the body to match.
- Magnets hold the jig in place and are adequate for our implementation
- 30% lightning infill seems to have enough structural integrity for the magnet holders of the jig design